Road traffic accident scene plotter drawing process in line with the traditional mapping habits of the civilian police, in the software design fully reflects the traffic accident scene processing process sequence and traffic police measurement habits, the use of ipad flat-screen handwriting notebook computer, no traffic police have a computer base, easy to learn easy to use, after simple training can easily play! The system has a wealth of functions, including templates, fast operation, multi-touch, survey transcripts, wireless printing, drawing roads, a variety of input methods. This quick start will show you how to use its important features better and faster.
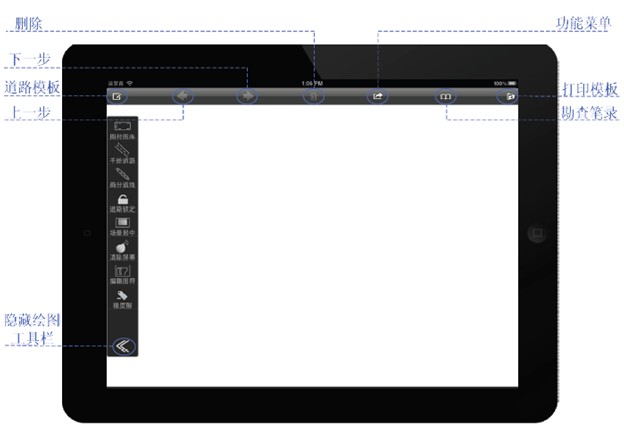
1 Introduction to the main interface
Above basic toolbar: road template, next step, next, delete, function menu, survey transcript, print template. Left drawing toolbar: Gallery, Hand-drawn Road, Drawing Line, Road Lock, Scene Center, Clear Screen, Edit Graphic, Eraser, Hidden Drawing Toolbar.
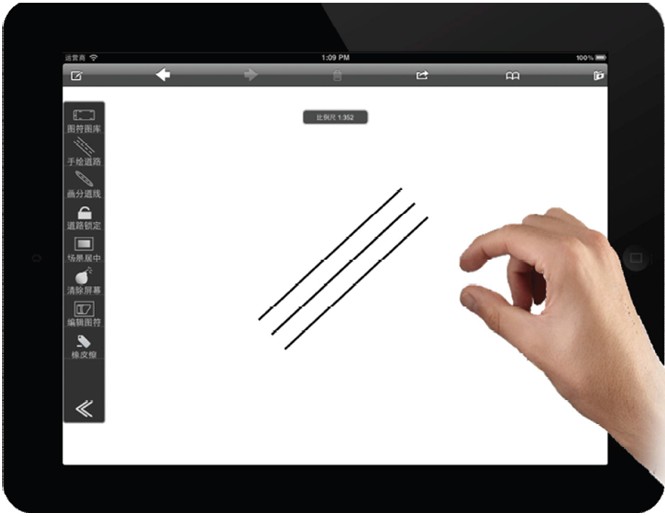
2 Draw roads more flexibly
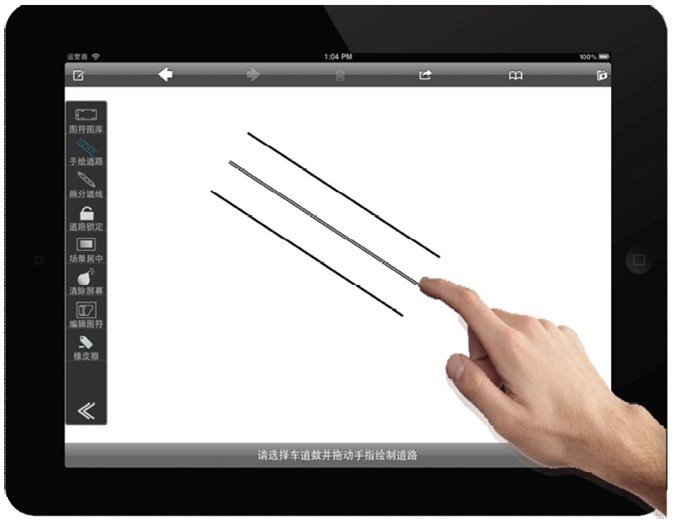
Roads can be imported from the Road Template, which are typical roads that come with random. Standard templates are immutable. However, local typical and special roads can be saved to pre-built roads. The next time you use it, you can call it up directly in Prefab Roads in the Main Menu. The process for hand-drawn roads is to first click on the hand-drawn road, select the number of lanes, and draw the road in the scene. Finally, add and modify road elements, such as steering signs, parking lines, pedestrian crossings, etc.
3 Pick a figure
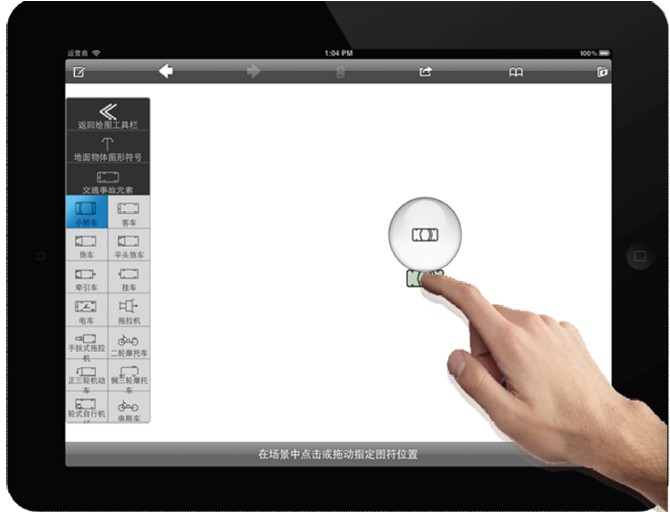
Select the icon icon and tap or drag within the scene to where you want to place it.
4 Check the figure
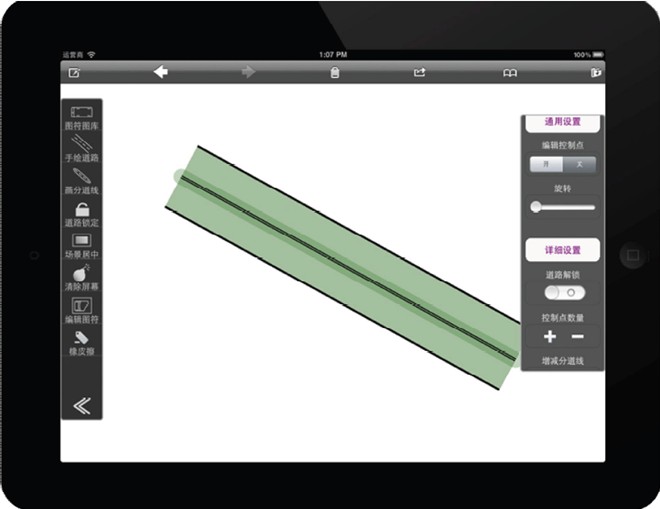
Click the figure, which is highlighted and the property bar appears on the right.
Set the figure character: When the figure character is selected, the property bar appears on the right, and the first layer interface of the property bar contains some of the settings commonly used by this figure. Click the universal settings to move to the next level to make the class more color. Clicking on the detailed settings to more set some unique properties of the class figure.
Delete action: select the figure, enter the highlight state, and then click the delete icon, delete the figure.
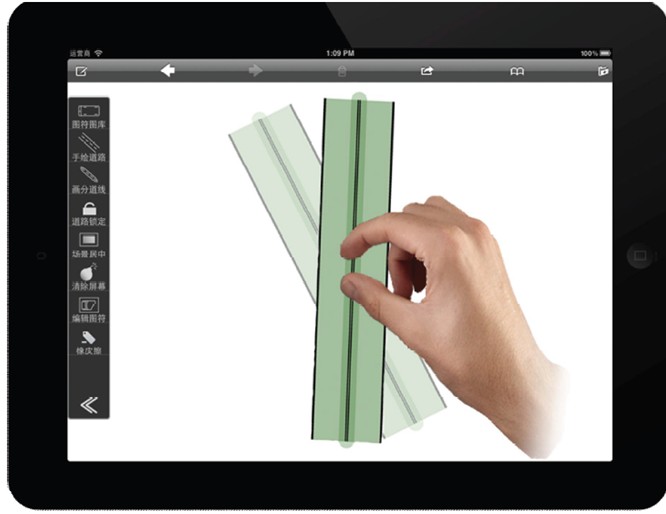
More than 5 finger controls
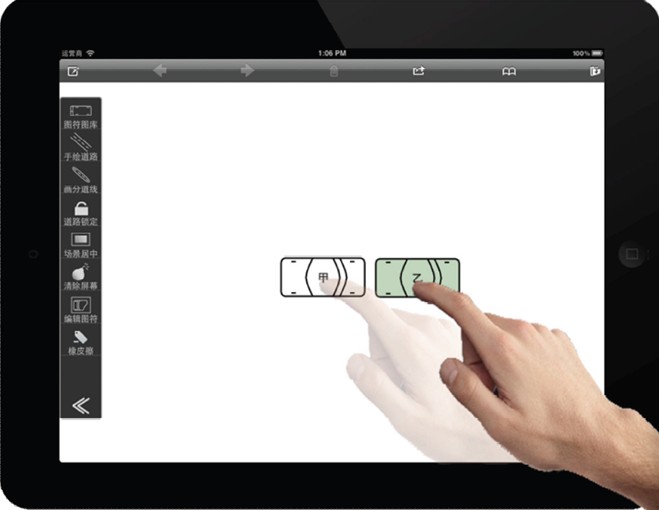
Pan operation: With a single-finger edit, move your finger so that the character moves the pattern to the right place with the finger. Wiggle the figure character to copy the original schema. Don't worry when you shake, just shake it a few times, and it's forbidden to replicate again within 3 seconds of successful copying.
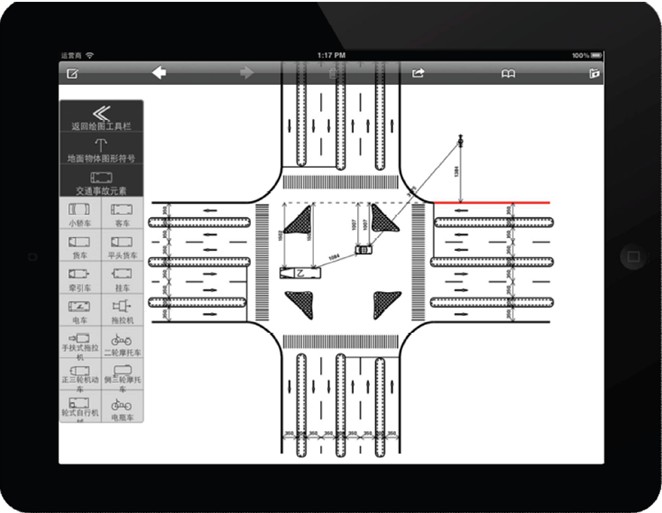
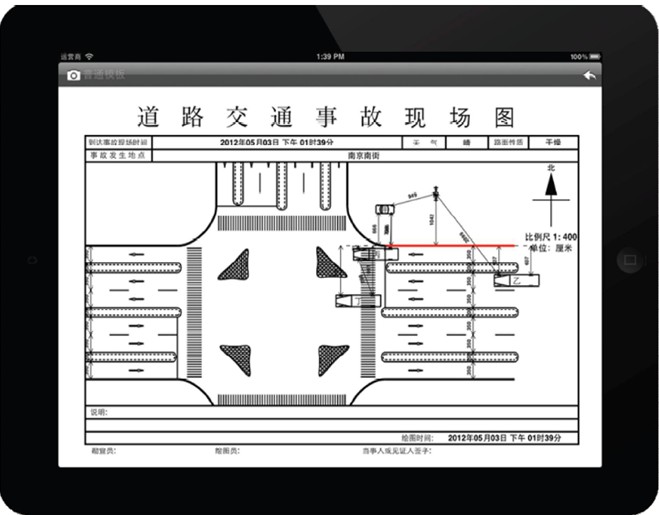
6 Smart positioning
When you set a baseline and a ground object in the scene, adding a driverable class figure, such as a car chart, automatically finds the nearest object and the baseline. Simply enter the measured value. And there are a variety of positioning options.
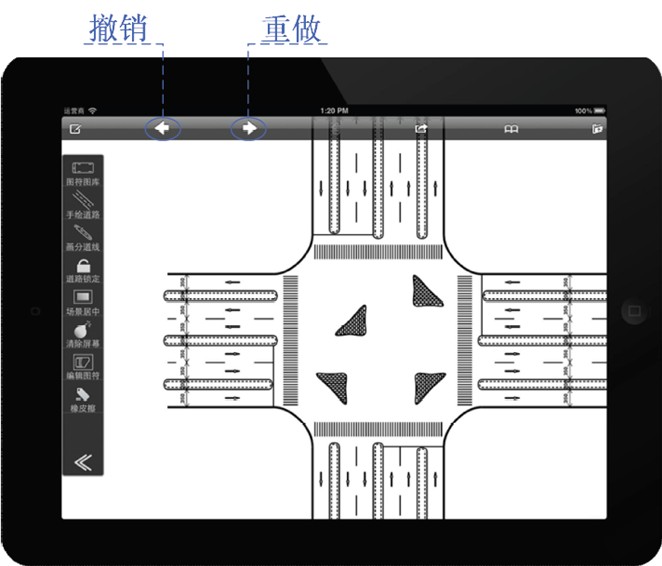
7 Reset operation
When an operation error or system problem causes an unexpected exit, the next entry will be directly restored to the last step before the system exited. "Undo" and "redo" are the important functions necessary for accident drawing, can be in the case of misoperation, return to the previous step of operation, reduce unnecessary errors, the current software set the revocation step of up to 50 steps, that is, can be traced back to the current step of the first 50 steps of the operation. "Redo" is the reverse operation of "undo".

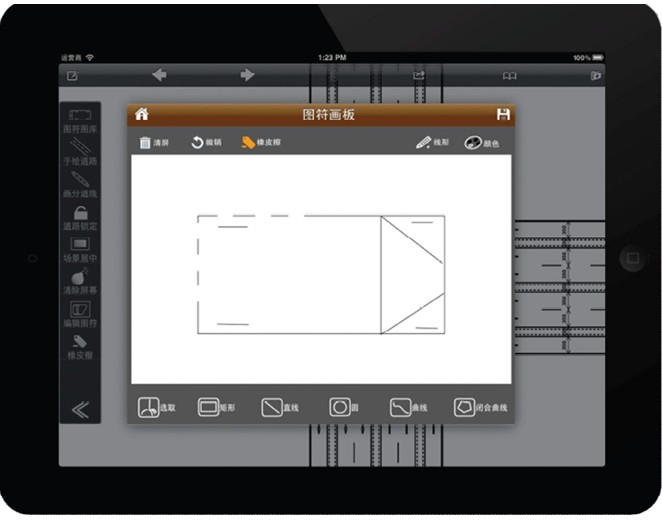
8 Edit figure
The desired figures can be drawn according to the situation in the field. When you need to use it, you choose it in the gallery custom figure class. The characters in the scene can also be modified with the Eraser tool, making it easier to draw them.
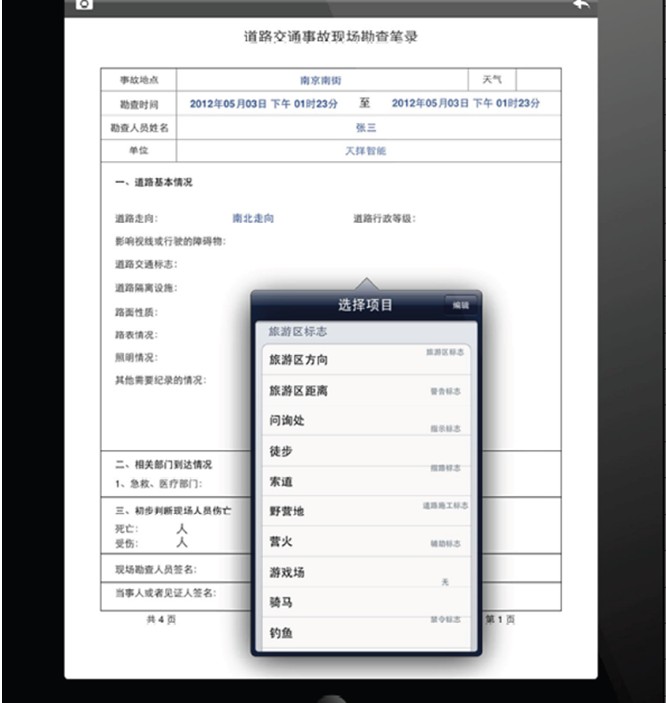
9 Wireless printing
Survey transcripts: Most of the content filled in is optional, or special options can be added manually.
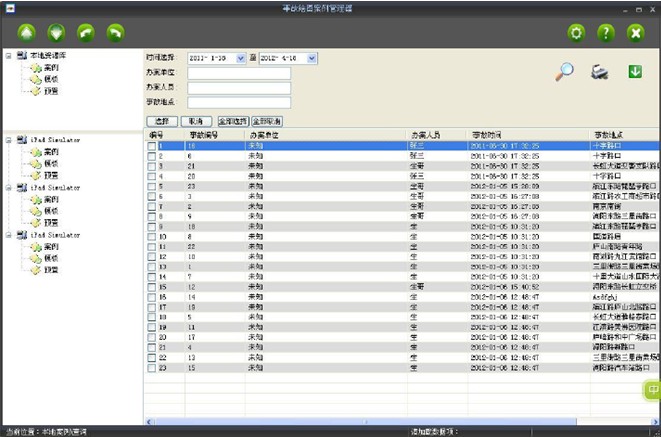
10 case uploads
Connect to the PC via accident drawing software to upload saved cases and share other iPad-drawn cases.